| Info |
|---|
Please, remember to log in to your Jira instance with Administration access so you can manage Notification Assistant and create email templates. To learn more, read Installation Guide. |
| Table of Contents |
|---|
How to set up your notification in Notification Assistant for Jira 7.0
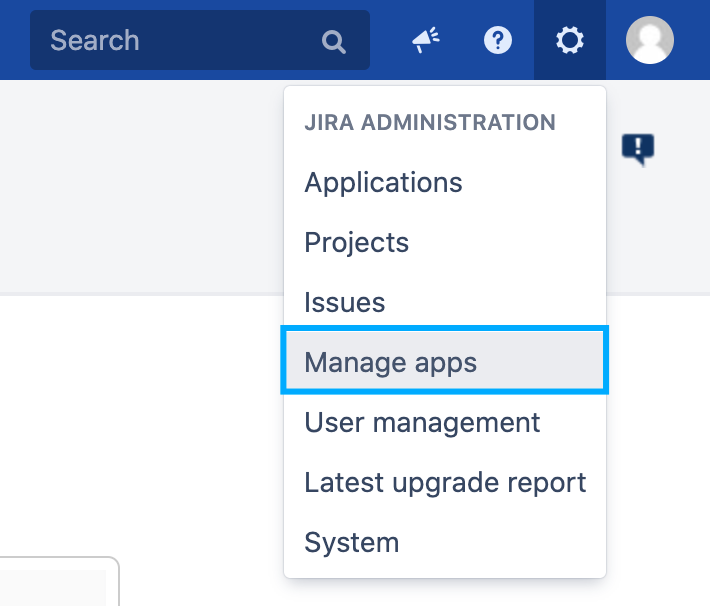
To set up notifications in Notification Assistant, go to the Jira administration in the upper right corner, click on the "Manage apps" tab, and confirm your administration access.
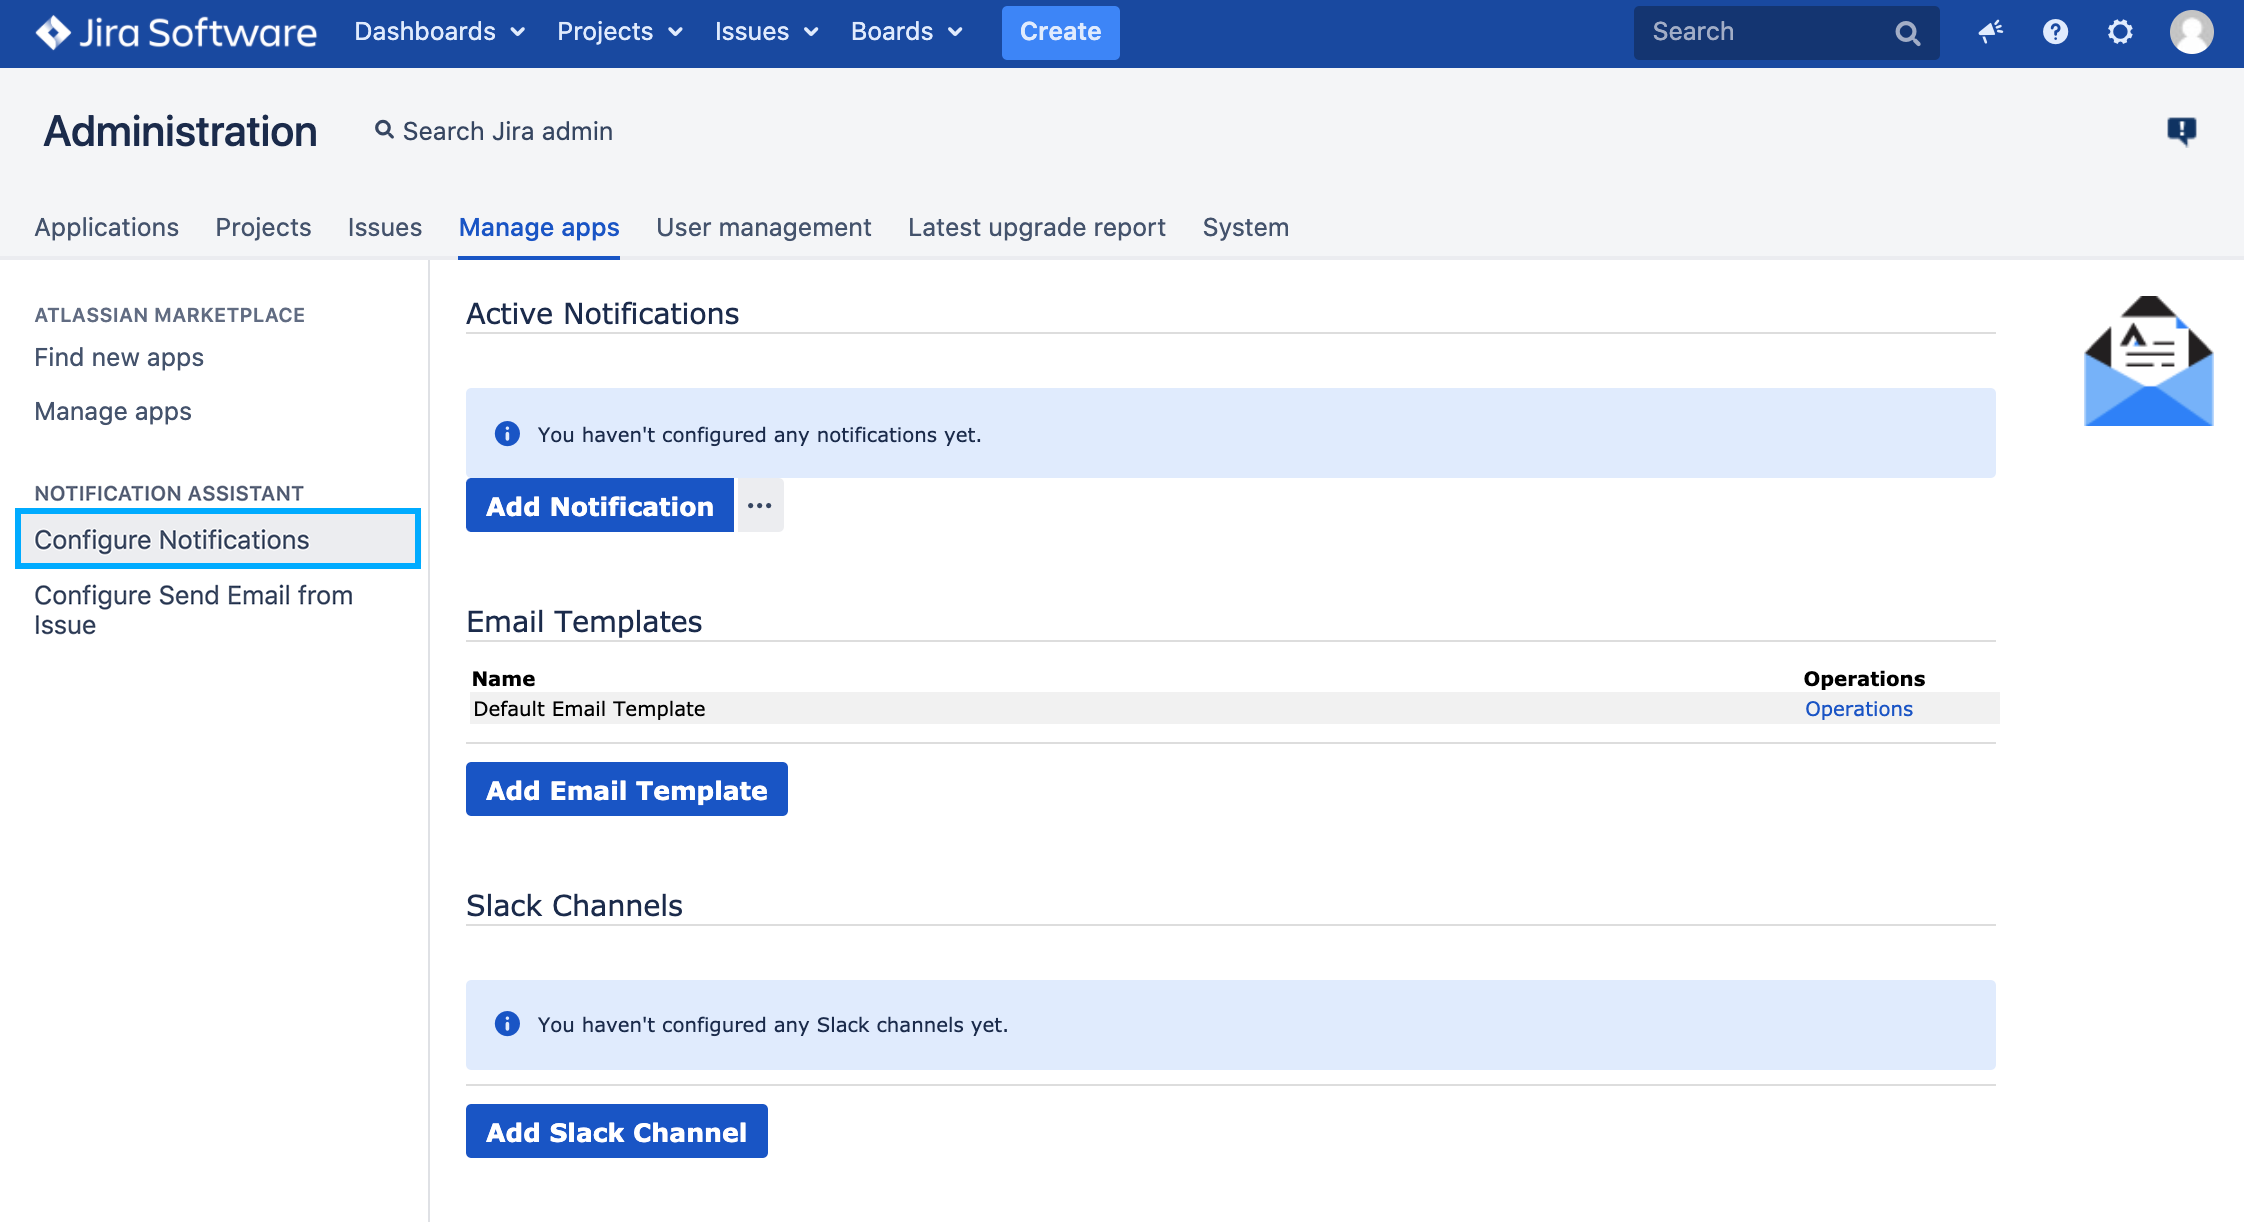
On the left side of the screen, you will find the "Notification Assistant" panel. After you click on "Configure Notifications," you will see three blocks: Active Notifications, Email Templates, and Slack Channels. To set up your notification, click on the dark blue "Add Notification" tab.
In the new window, you will see the Configuration Screen. Please, note that the fields with the red star are required. Configure your notification following the steps described below.
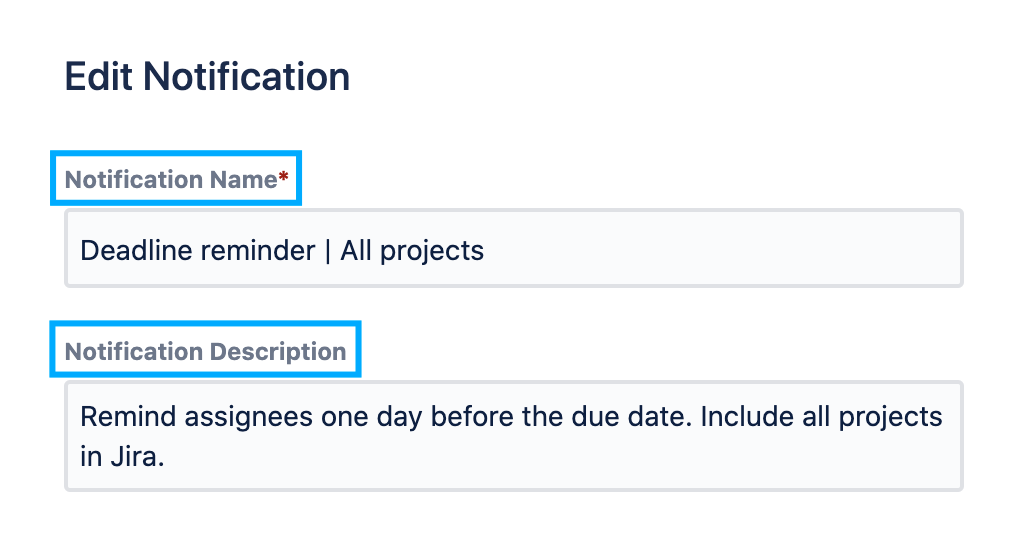
Edit Notification
Notification Name. Provide a unique name for your notification in this required field. You will see the name you provide in the notification email.
Notification Description. If you like, you can provide your notification with a description to remember the notification's purpose.
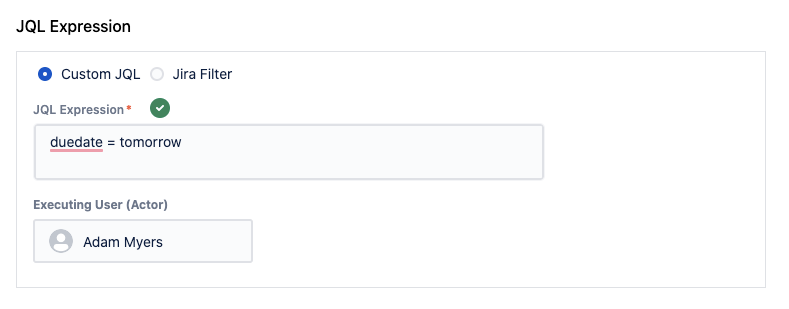
JQL Expression
Custom JQL. You can write any JQL expression to fire your custom notification. To learn more about JQL syntax, read Advanced Searching.
Jira Filter. Make sure you set JQL type to Jira Filter. Select the filter you want to apply to your notification. Jira filter may be useful if you, as an administrator, want to delegate the possibility to define the JQL to query on. You can learn more about Jira Filters here.
Executing User (Actor). You may specify the Jira user who the notification should run as. This will impact what issues show up in your JQL specified above. It could be necessary, for example, if you're working with Jira Service Desk JQL functions since it has to be executed by an active agent.
Choose Email Template
If you’d like to notify your recipients via email, you can apply a template to the notification. The list of available email templates is visible in a drop-down menu. You can use Default Email Template or create personalized email templates in the new drag-and-drop template editor (available from version 7.0).
We recommend you use our Create Email Template docs to create a default Issue Details Template and a Comment template which can be used with the associated issue events.
Add Recipients
You can pick recipients from Jira users, Groups, Project Roles, Custom Fields, or enter their hardcoded email addresses. To add recipients, click on the “Add Recipient” tab and choose the required checkboxes in a modal window.
| Info |
|---|
Recipients that are email addresses in custom fields, or hardcoded in the Email tab do not need to be licensed Jira users. However, this also means we can’t perform permission checking. Please be careful with how you use this funcitonality. |
People. In this tab, you can add Assignee, Reporter, Watchers, Voters, Project Lead, or Component Lead to the recipient list.

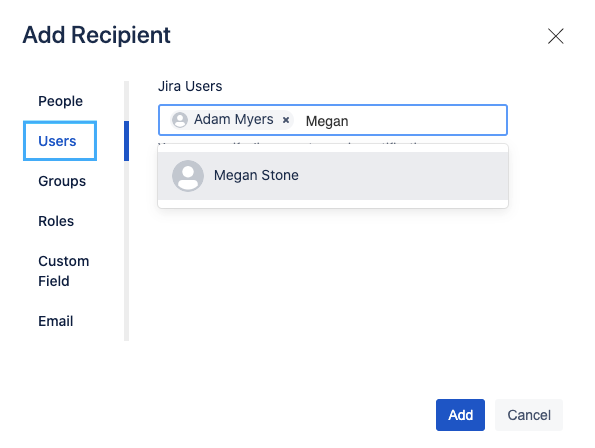
Users. In this tab, you can specify Jira Users to receive notifications. Enter a user name in the user picker.In case you add a Jira user who has no access to the issue or project you configured in the notification, this user won’t be notified. If you need to notify this person anyway, add their email address to the recipients.
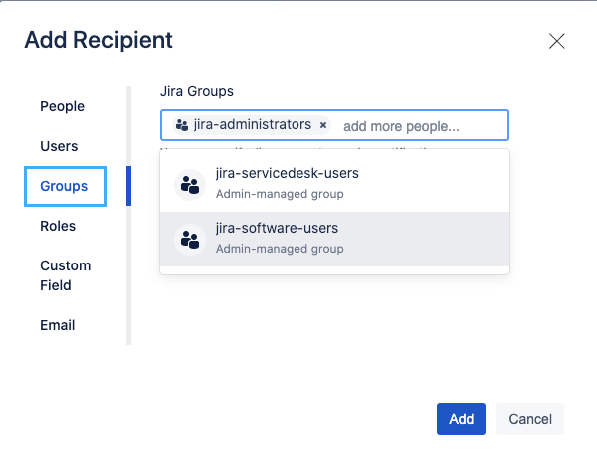
Groups. Select one or more Jira group to receive notifications. Your notification email will be sent to every recipient separately, not as a group letter in your email agent. See more about user groups on the Managing groups section.
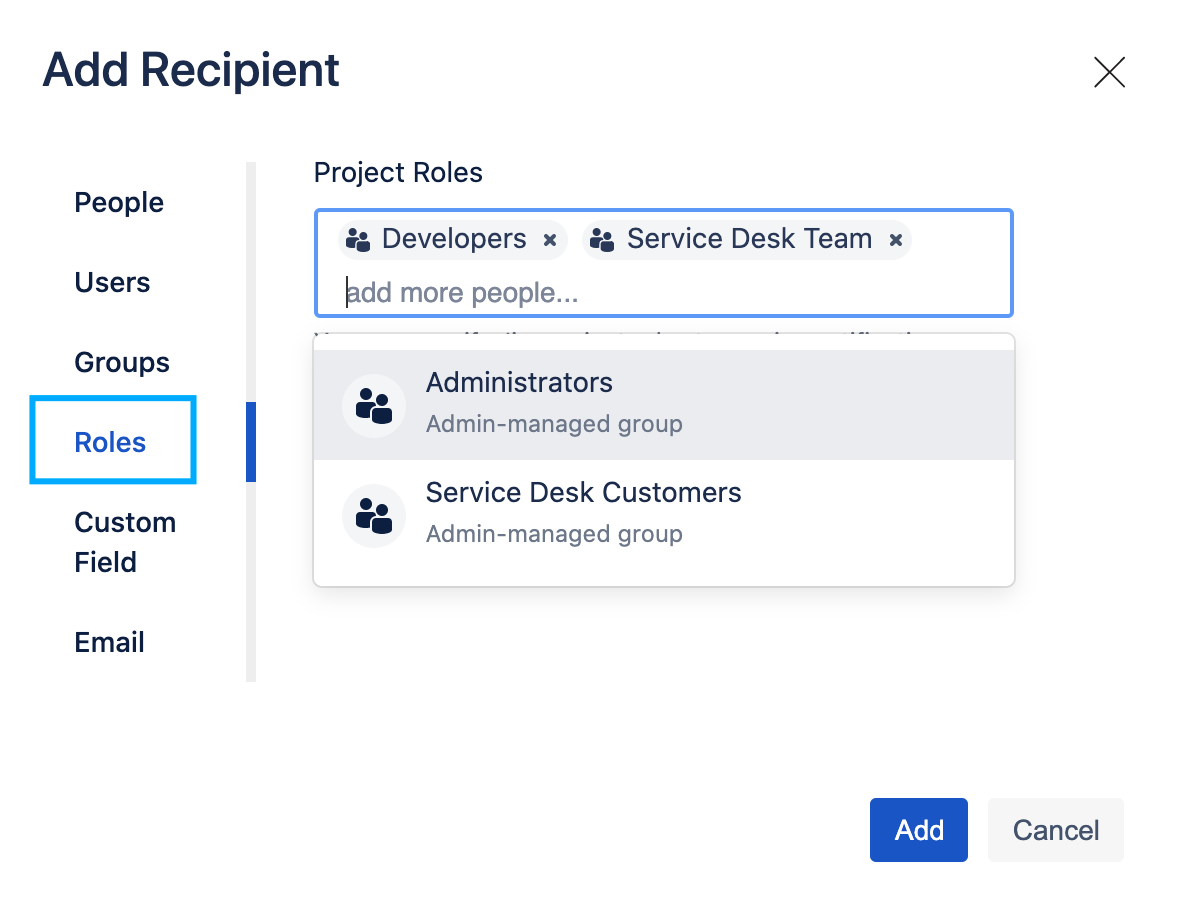
Roles. You can select one or more Jira Project Roles to receive notifications. For example, it could be Developers, Administrators, Service Desk Customers, or Service Desk Team. See more about roles on the Managing project roles page.
Custom Field. To add recipients from custom fields, you can choose a custom field of type "Text Field," "User Picker," "Multi-User Picker," "Group Picker," "Multi-Group Picker" and "JSD Request Recipients" to be the recipient. The custom field of type "Text Field" needs to be populated with one or many valid comma-separated email addresses for notifications to be sent. You can add custom fields in the administration menu "Issues / Fields." See more about custom fields on the Adding a custom field page.

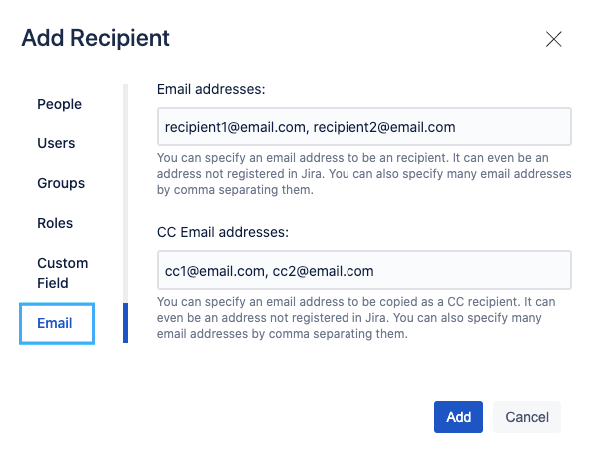
Email. Whether it’s a licensed Jira user or an external recipient, you can specify one or many email addresses separated by a comma to notify these people. Add CC email addresses, if needed.
Trigger Configuration
Here is where you determine when the notification should fire and in which interval.
| Note |
|---|
You can only use one type of trigger configuration for each Notification. |
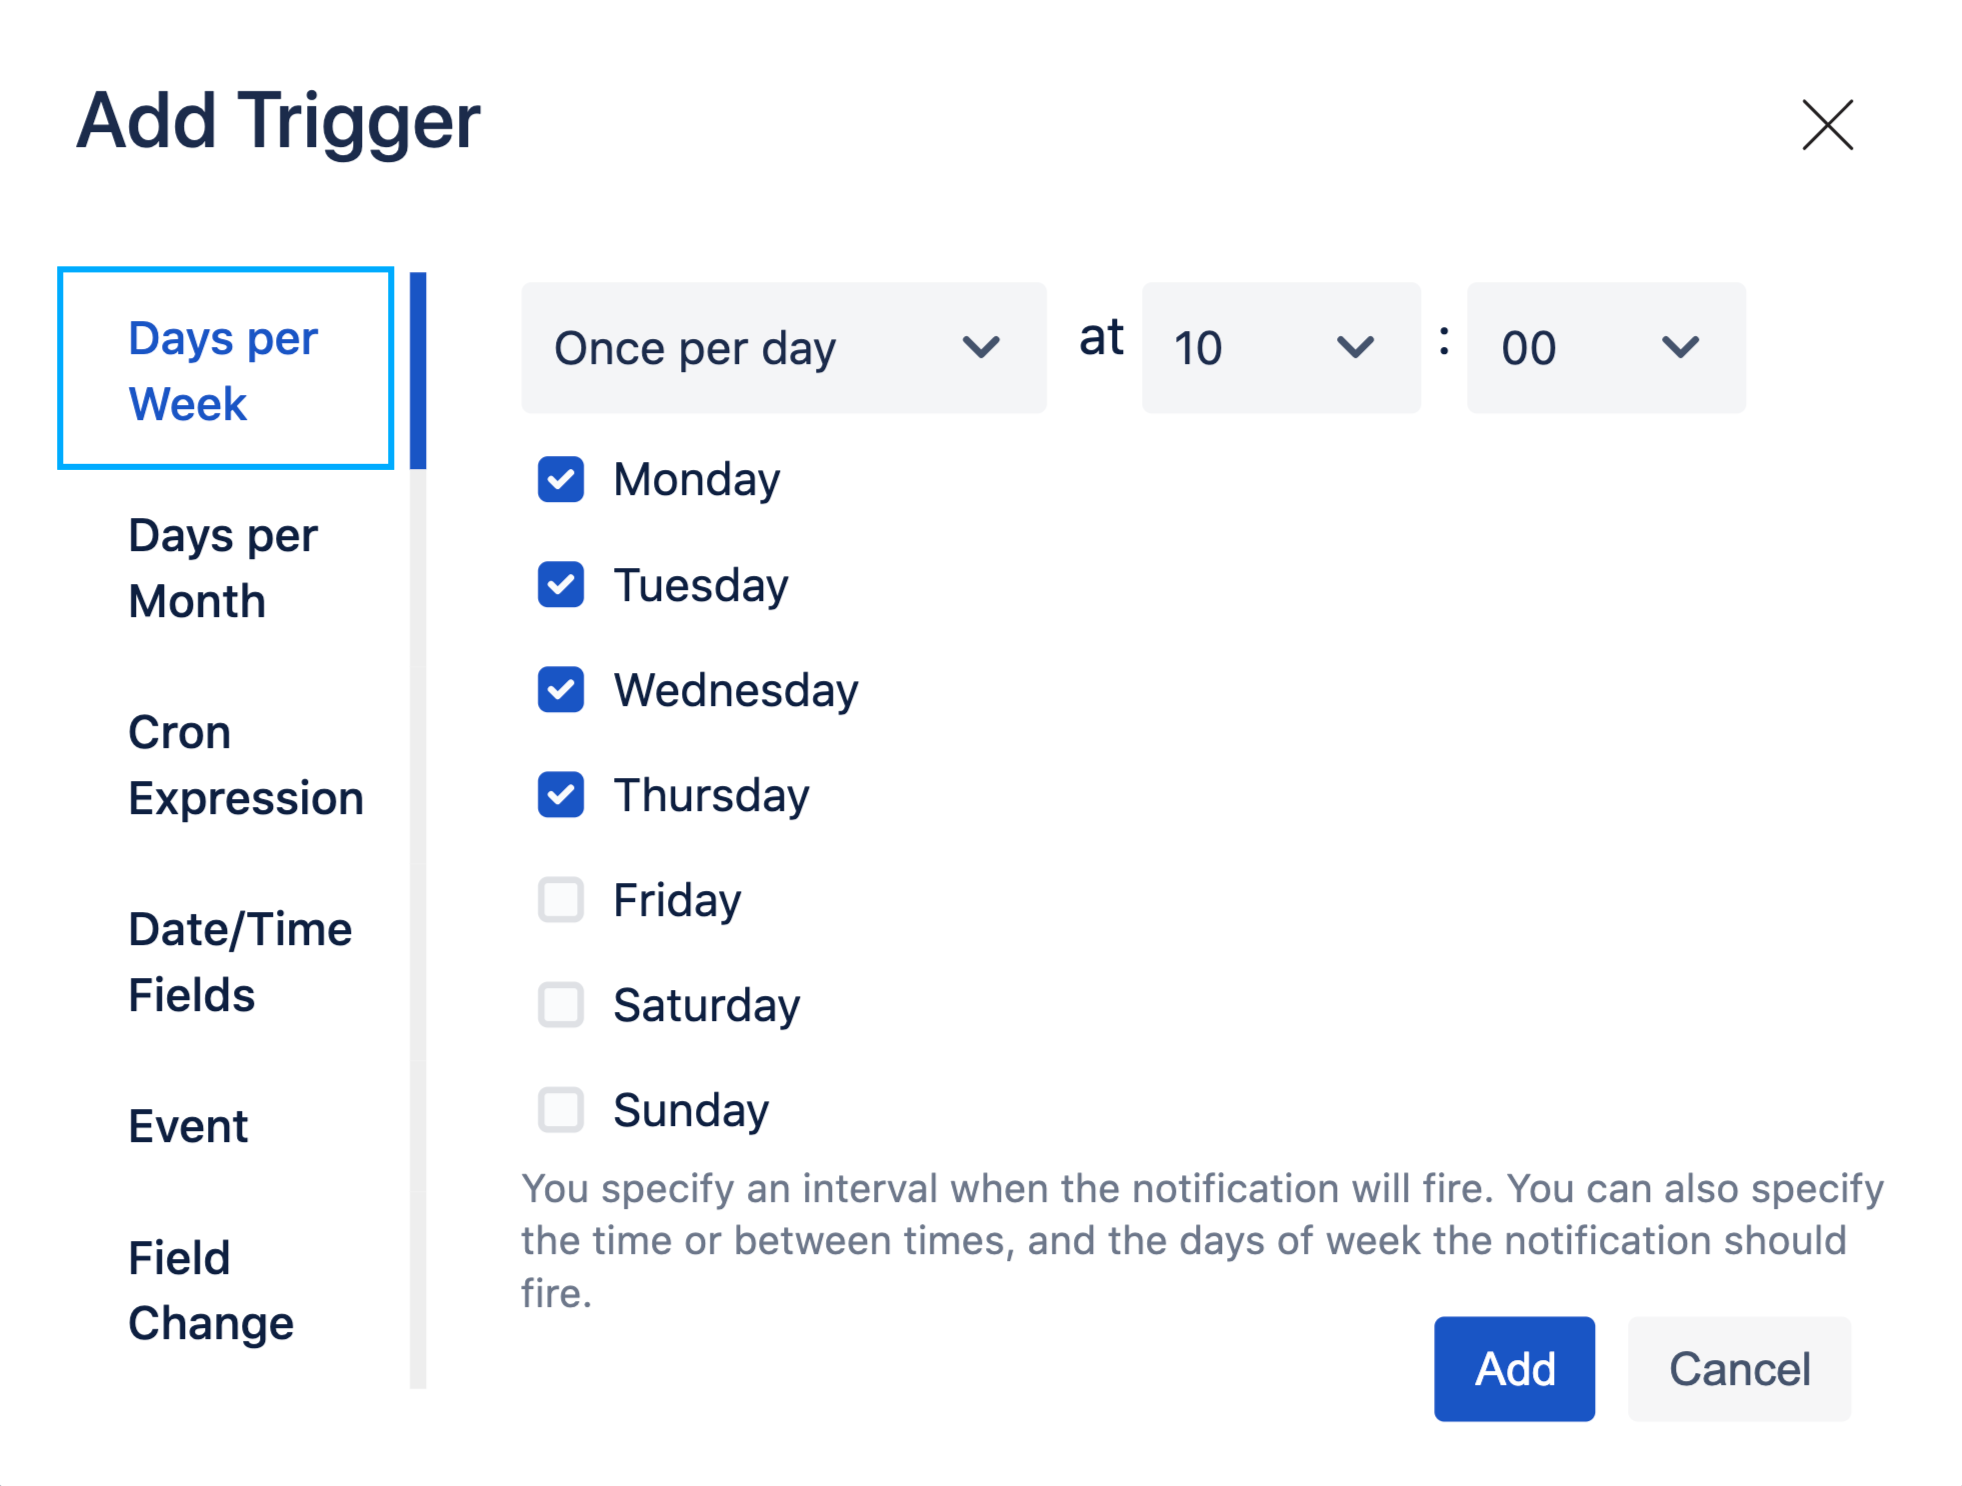
Days per Week. In this tab, you can select how many times per day, at what time interval, and on which days the notification will fire.
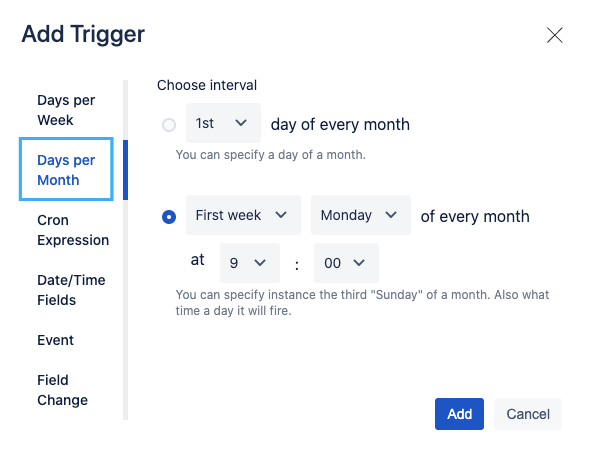
Days per Month. Choose the first radio button to set up the exact days of the month to fire the notification. If you'd like to fire a notification on the particular day of the week, the second radio button is for you.
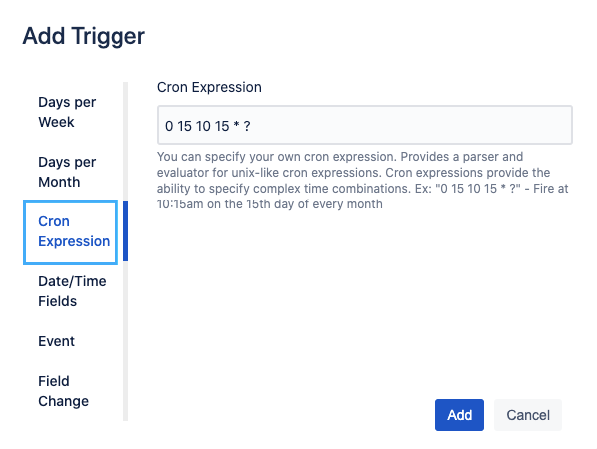
Cron Expression. You can specify your own cron expression. It provides a parser and evaluator for unix-like cron expressions. Cron expressions provide the ability to specify complex time combinations. Example: "0 15 10 15 * ?" = “Fire at 10:15 a.m. on the 15th day of every month.”
 Cron is powered by the Quartz Scheduler in Java. We recommend using Cron Expression Generator to help build and test your Cron expressions. Particularly, make sure you use the Next Execution Dates feature to make sure you see when the first run will be.
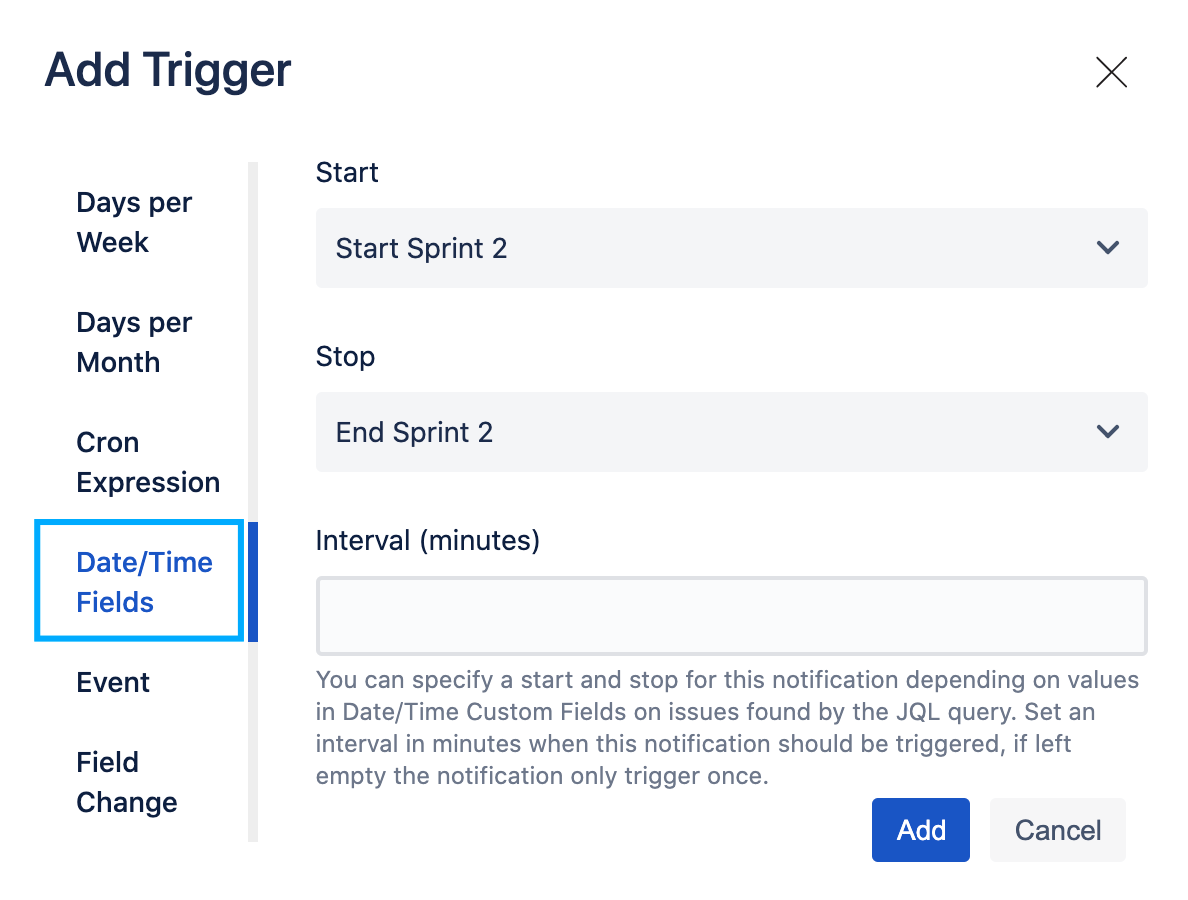
Date/Time Fields. If you choose this trigger, you have to pick “Date” or “Date Time” fields that act as a secondary filter. This notification will run every interval and will only include issues where the current time is between the Start and Stop field values.
 It is essential to understand that the first notification for a given issue will not occur precisely when the Start time happens. It will appear the first time the notification Interval re-occurs, and the Start time is in the past, and the Stop time is in the future.
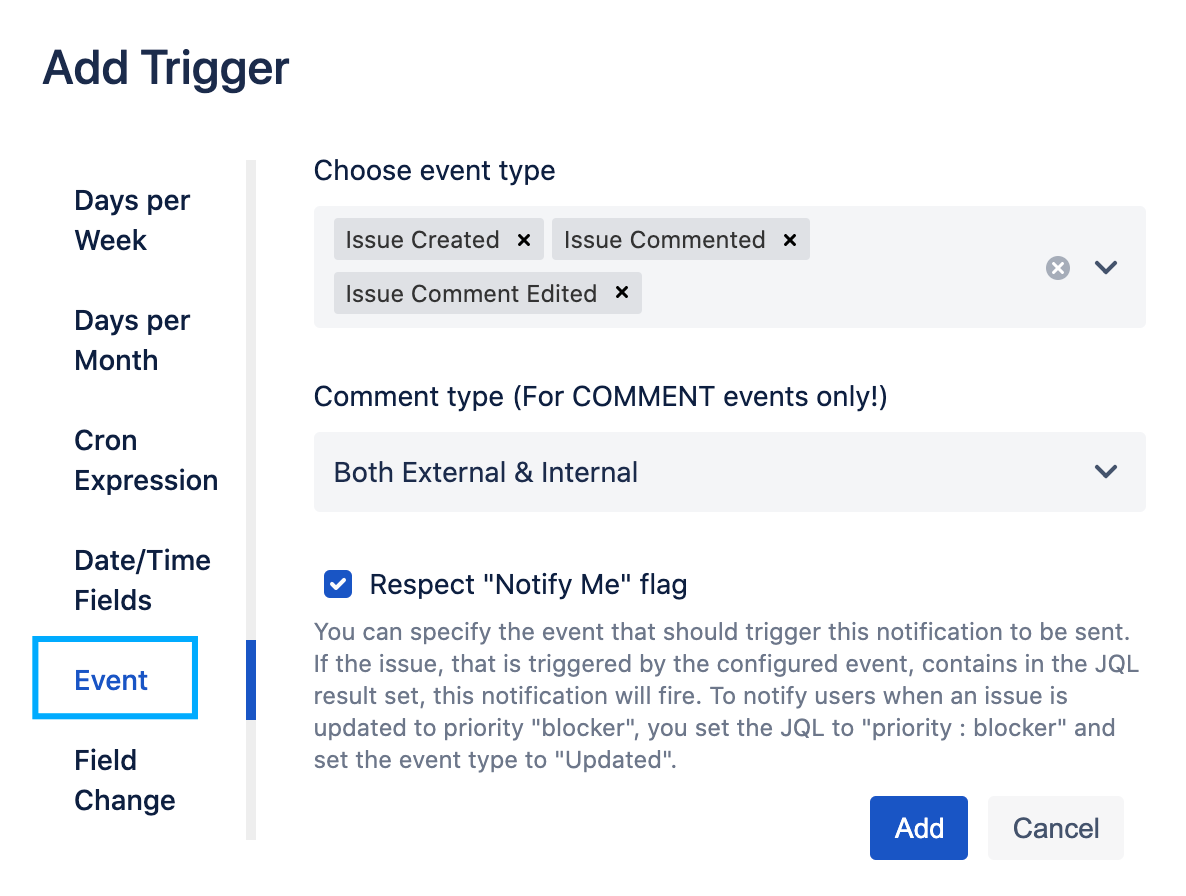
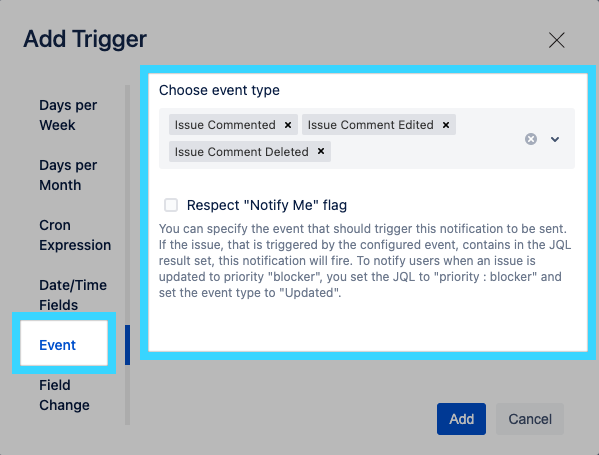
Event. If you choose trigger by events, in some cases (like "closed" event), make sure you have set the Jira event in the post function within the transition. You may choose the notification to respect the "Do not notify me" settings in the Jira user profile. In the Comment type section, decide whether you need to send comments internally, share them with a customer (external option), or both.
Field Change. Fire a notification whenever a specified field is edited. It is important to note if you have two fields with identical names, there is no way for us to tell them apart on the backend during an issue event. As a result, this can lead to some unintended notifications. You can prevent this by filtering the field in the JQL to reduce the problem.
Tip: Remember that too many or low value notifications may be consider spam by your recipient.
Advanced Notification Settings
Minimum issues to trigger a notification. This field is responsible for how many issues in the JQL results are required to trigger a notification. For example, if you put 5 here, your notification will not be triggered if JQL search finds 4 issues or less.
Maximum times an issue can trigger a notification. Here you can set up how many times an issue can trigger a notification. Once the difference between the value set here and the number of times an issue has been included in this notification is equal to or less than 0, future notifications will not contain this issue.
Reset trigger. Click this button if you need to reset maximum times an issue can trigger a notification.
Sender email address. Specify the email address you’d prefer to send notifications from. This can help recipients respond to this email and need it routed to a specific place other than Jira's default outbound email address.
Comment type (Internal/External). Configure whether you need to send internal comments in the notifications, public comments, or both. A common configuration is to have a notification set to Public comments with recipients set to your Jira Service Management customers, and a second Notification with this setting configured to both, with the recipients as your internal staff.
Attachments. Mark the checkbox if you need your notification to include attachments.
Additional send hooks. With additional send hooks, you are able to notify your internal or external systems besides the ordinary email notifications sent out.
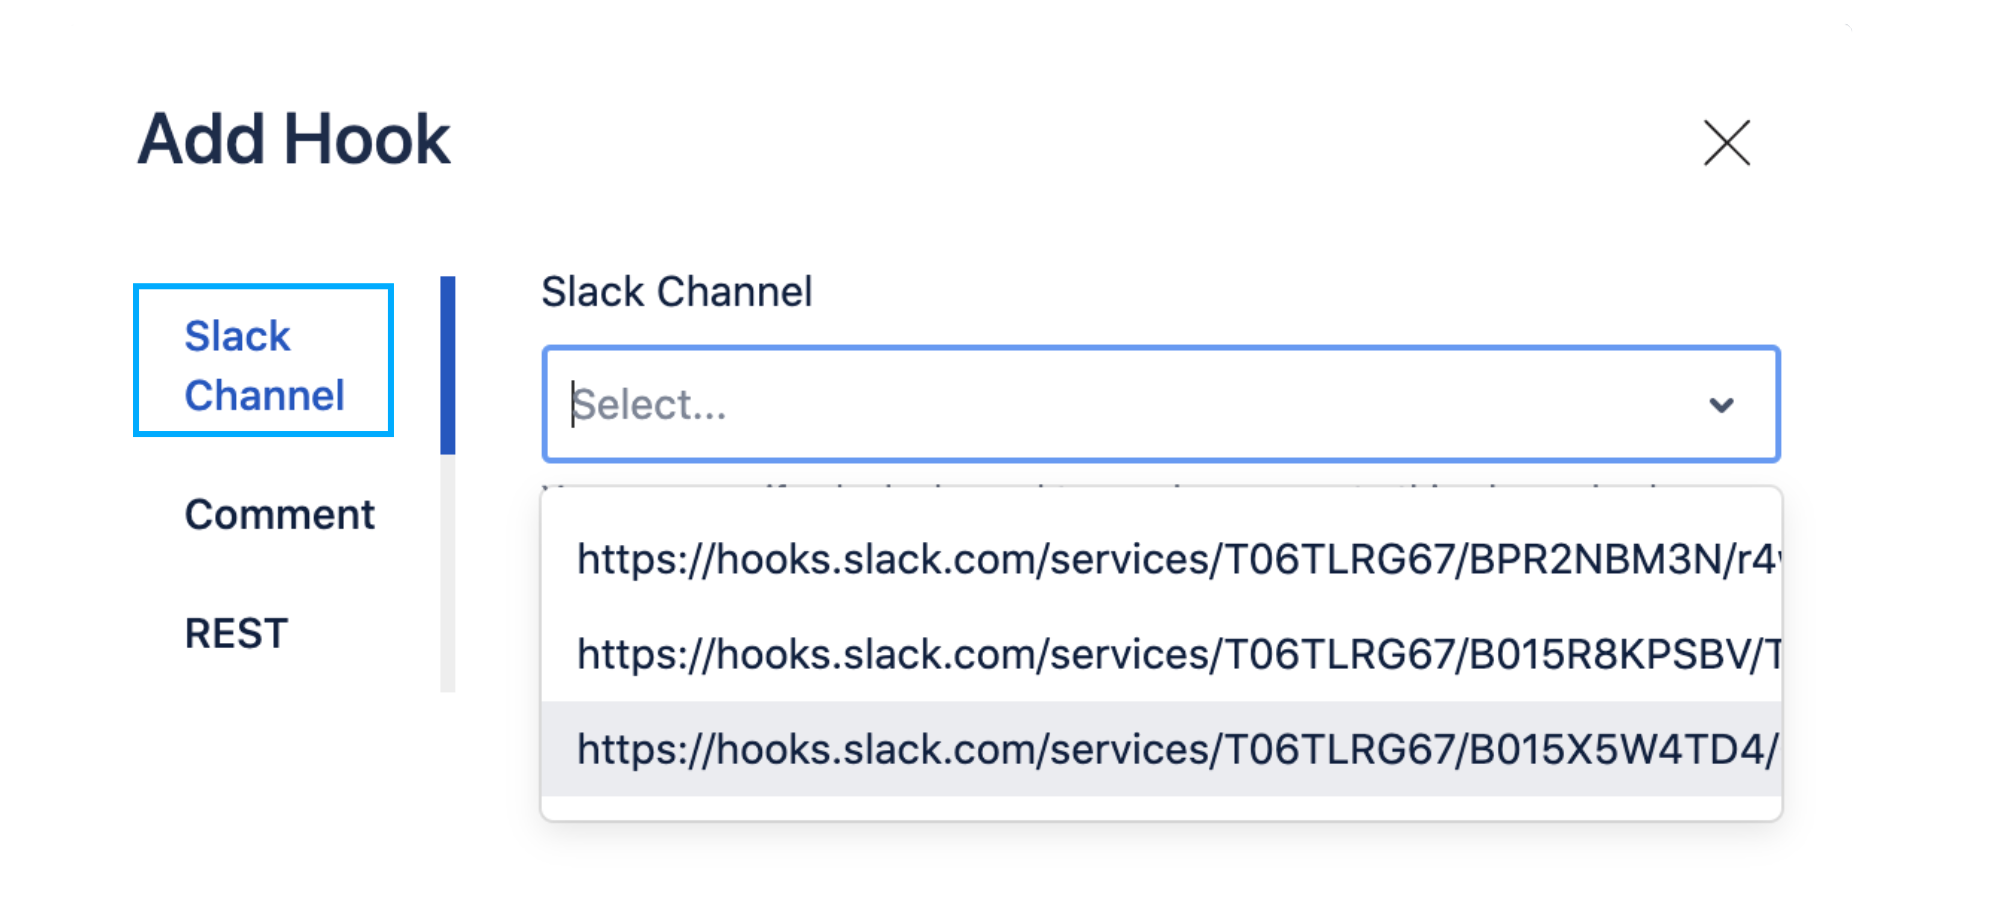
Slack channel. Deliver your notifications to a specific сhannel in Slack. In order to enable Webhooks from Slack's side and generate a URL, follow the steps in the Slack documentation. Learn more about how to connect Slack to Notification Assistant here: Slack.
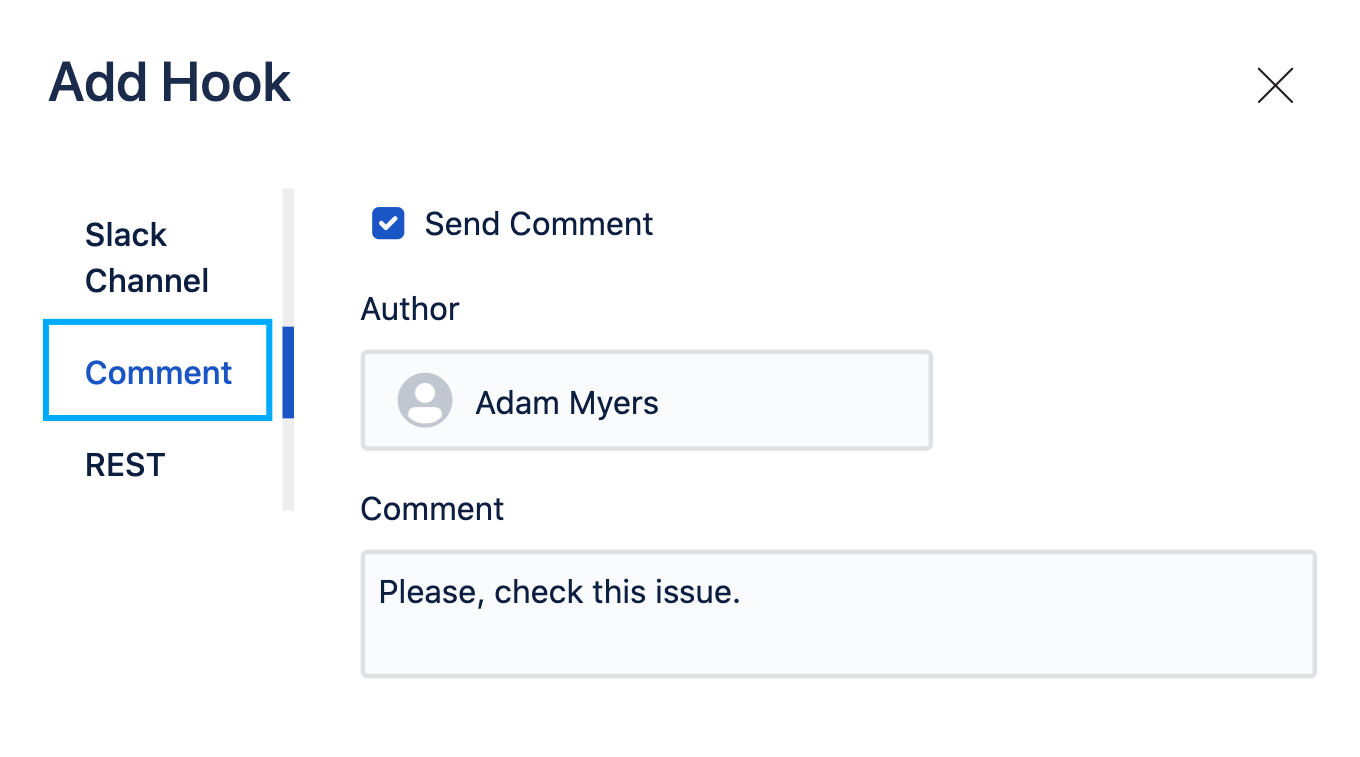
Comment. You can allow Notification Assistant posting comments to the issues found in the result set of this notification. Select the comment author who will post comments. Make sure that the author has privileges to add comments on the affected issues.
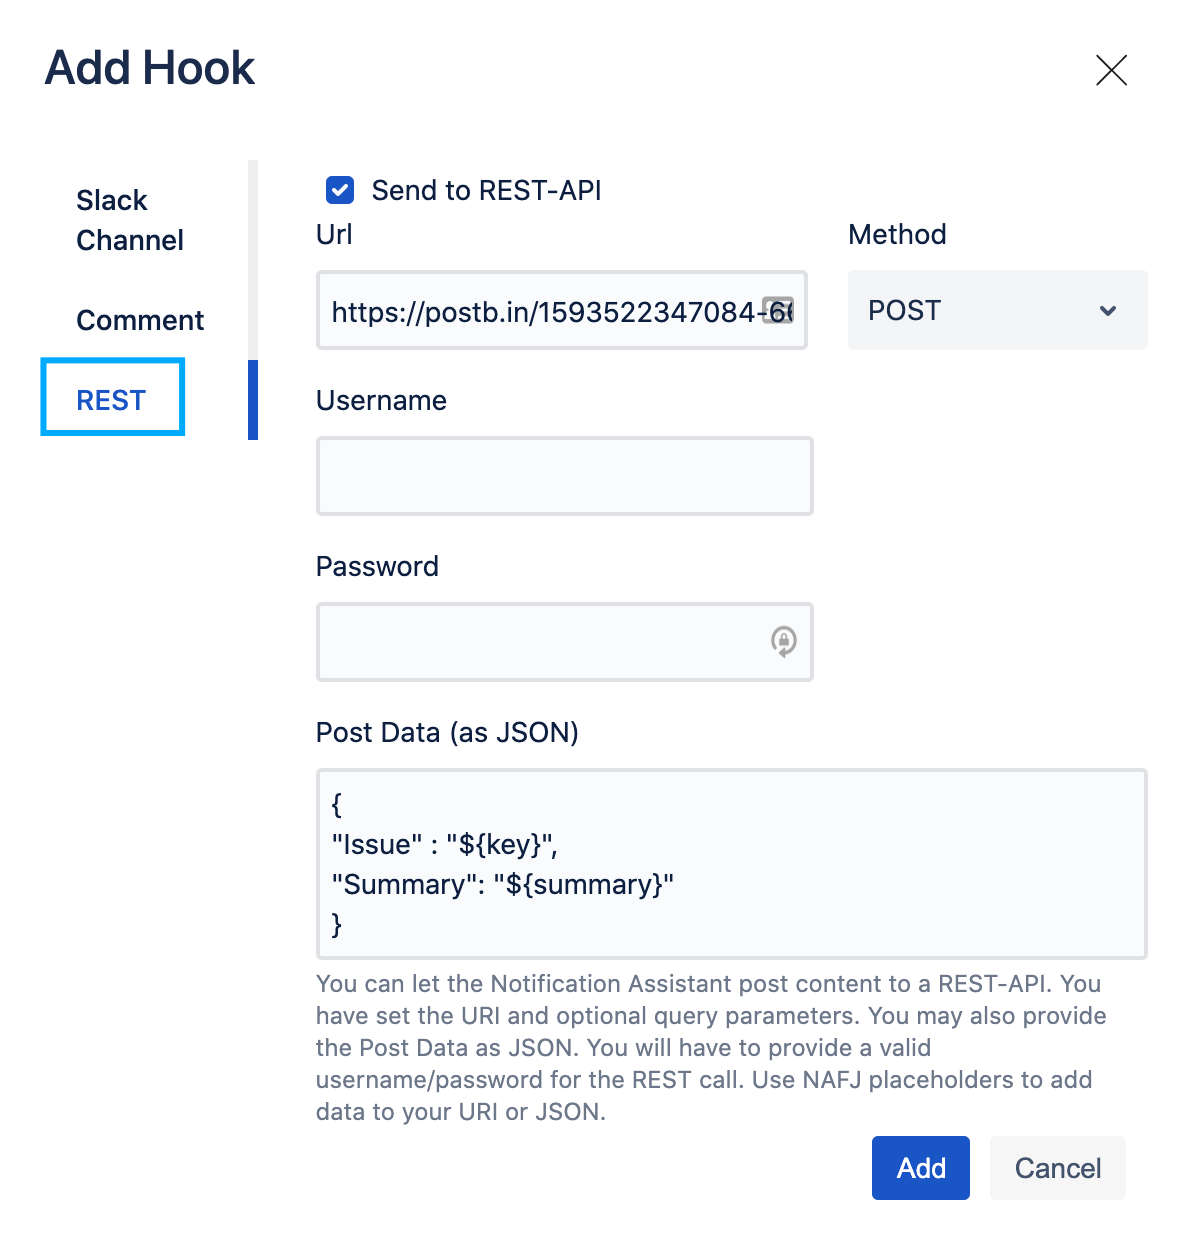
REST API. Call a REST-API to let your system know about the notification.For example, add or update a page in Confluenceor notify some internal system that needs to be triggered in some critical stage.Use placeholders in the posted data to be able to send data depending on the issues in this notification.
| Note |
|---|
Please, note that we support only one additional send hook per notification today. Consider creating another notification for the additional channel. |